My brother Nathan has already started posting about the construction of the alley way set which features at the beginning of our film. You can find that HERE.
I thought It would be best to start at the begging and to show the first shot we set up for the film. To ease ourselves back into the swing of things we decided to tackle one of the more simple shots.

Pictured above is an image of the shot in question as it appears in our storyboards. The shot features the Mail man character looking up towards the camera with a look of shock/worry on his face. He then quickly raises his arm to look at his watch. In the film the character is actually standing outside, in front of the theatre, looking up at a billboard featuring Elle (our Actress character). However no theatre set was need for this shot since that would all be behind the camera, and we didn't need to make much because the character is being shot from above and taking up most of the screen. All we needed was a small section of pavement, some tarmac road and a street light.

The set is lit using two halogen lights attached to a simple scaffolding lighting rig. The character is being lit heavily from the front to simulate the bright theatre front lighting around the bill board he is staring at. The camera is a Canon 500D attached to a secure tripod angled down towards the character so that the character is looking up towards the camera lens.
For this film we are shooing with Stop Motion Pro V7. The computer is on a separate station slightly away from the set with the monitor angled away to stop any unwanted light from affecting the shot. In the picture below you can see an image of how the framed shot looks on the monitor using the full resolution viewer of Stop motion pro. To save time and materials, we try to only build things the camera sees. This means a lot of cheating. For example, the street light cuts off half way with no actual light attachment. You never actually see the top on the light so instead we suggested a street light using some plastic piping and a bottle top painted matt green. The sidewalk and road were made with MDF and card simply sprayed with a grey primer followed by some stone effect 'speckle' spray paint for a concrete texture.


We then cut to a close up of the characters watch on his wrist. For this we made a large scale arm and watch which was close to being life size. The arm was made from a length of card tubing, covered in a thin sheet of flesh coloured plasticine. we used some spare material from the puppets cloths for the sleeve, which could be pulled back to reveal the watch. The whole arm was supported by a few twists of thick aluminium wire so we could give some movement to the arm. The watch was made from a jam lid, for the main body, and some spare leather material for the strap. We could have used an actual watch for this shot, but we felt that it would have stood out from the style of the film and looked too realistic. So instead we used my deluxe jam time piece.

We filmed this shot on the same set up so that the lighting would match with the previous shot. For this shot the sidewalk floor is out of focus with no visible shadow cast from the arm so it looks like it is further away from the ground than we actually shot it. The second hand of the clock could also be animated for that all important ticking

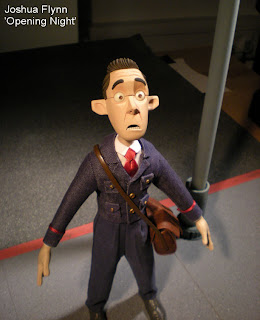
The next shot we decided to film allowed me to try out more of the puppets movements. This set was also very easy to make which might be a surprise considering what the storyboard panel looks like.


Once this shot was completed, I started working on an image of the theatre to use on the green screen. Using the rough mock up image as a guide I started blocking out the building with colours and added in a few more details. The size of this image was made taller than the usual wide screen aspect ratio to allow us to include a camera move in this shot, moving up to reveal more of the building. The lower part of the building was made using photographs of the theatre ushers set that was built. There are still changes to be made and a lot more details to add to this shot such as lights and textures. The billboard posters are also temporary. However, This does help us get an idea of how the shot will look once completed and is hopefully a bit better than the plain green screen we filmed against.

That's all for now. More to come soon.
Thanks for looking.
Bloomin brilliant work mate! Hope its all going well!
ReplyDeleteGreat to see the puppet in action. I'm learning a lot reading your posts. You guys rock!
ReplyDeleteFantastic, simply amazing stuff! Can't wait, to see more! Congratulations!!!
ReplyDeletelovin your blog man.
ReplyDeletejriggity
awesome job, i love the blog
ReplyDeleteGreat post!! Very nice character as well :)
ReplyDeleteThanks everyone for your very kind words. I'm glad your liking my blog. more to come soon.
ReplyDeleteHello,
ReplyDeleteI have a question about your camera movement.
How did you manage to do travelling, pan and zoom ? Did you use something you bought like that : http://vimeo.com/25559253 or made by yourself ??
Thanks a lot for you're wonderfull work and blog !!
Hi Gil,
ReplyDeleteNo, we didn't use any sort of motion control device on our shots. Not on our budget. Although that Cineslider looks like a great bit of kit.
Our approach was a lot less high-tech.
We simply attached our camera to a block on MDF, and created a 'track' for the block to slide along our set surface, out of a long plank of MDF and a square dowel.
The dowel was glued to the MDF plank to create a smooth ridge for the camera block to be pushed against and slide along. The camera movements were simply marked out using a tape measure or pencil marks.
Any zooms were either animated by hand, on the camera manually, using measurements attached to the camera, or in post production while editing.
We found that attaching a pin that slides over your measurements, to whatever camera part your sliding manually, is a good way to accurately gauge your movements.
Hope this helps out.
All the best,
Josh
Thanks a lot for your answer !!!
ReplyDeleteWhen you said that you use measurements attached to the camera for the zoom, that mean that you fix a ruler to determine of much you have to push the zoom ?
So you did a great job with the zoom because it's kind of hard to be precise if you have to divide a very small amount of cm.
I have an other question which have nothing to do with the last one : how did you manage to blink your character ? Was it in post prod ? or( and i will try do to that ) you create smalls pieces of eyelid and switch them.
Thanks a lot !!!!
Yes, we attached strips of paper with measurements around the camera lense. It did involve very small movements,so that's where the pin came in handy to more precisely judge how far we had turned the lense. It was all removable (there's no way I'm damaging my camera), the pin was held in place using blue tack.
DeleteObviously this technique is not ideal, and usually you'd want to avoid touching the camera as much as possible. It also helped that we were animating quite a fast zoom. The quicker movement hides any wobble. If we wanted to achieve a very slow, smooth zoom, then it would be easier to do this with editing software in post-production.
The Mail man's blinks were sculpted in plasticine and switched out. The actress's blinks were sculpted in super sculpey because they required more eyelash detail, and were attached using tackywax.
Hope this helps.
Thanks for such a wonderful post.
ReplyDeletesquare truss rental orlando